NOTE - Please be aware that I am by no means any sort of expert, I just tried my hand at this and thought I would share my first experience. Maybe you can learn from my botch ups. I started out by watching this tutorial on youtube. https://www.youtube.com/watch?v=hj-WC35cxgs
1. Making the pattern
Many tutorials use your own figure to make the base pattern, but I didn't quite want all those lumps and bumps, and thought I would really struggle to do this whole thing on myself, so I set my mannequin to the right measurements, popped on one of my bras and got started.
First step is to cover it all in a good layer of clingwrap. I bought some of the really cheap stuff so that I could make sure I had a really good coverage. Then you get some paper masking tape, tear off bits and cover everywhere that you want your breastplate / armour to sit against you.


Next, grab a marker and draw the pattern pieces onto your tape. The bust cups should be separate pieces.


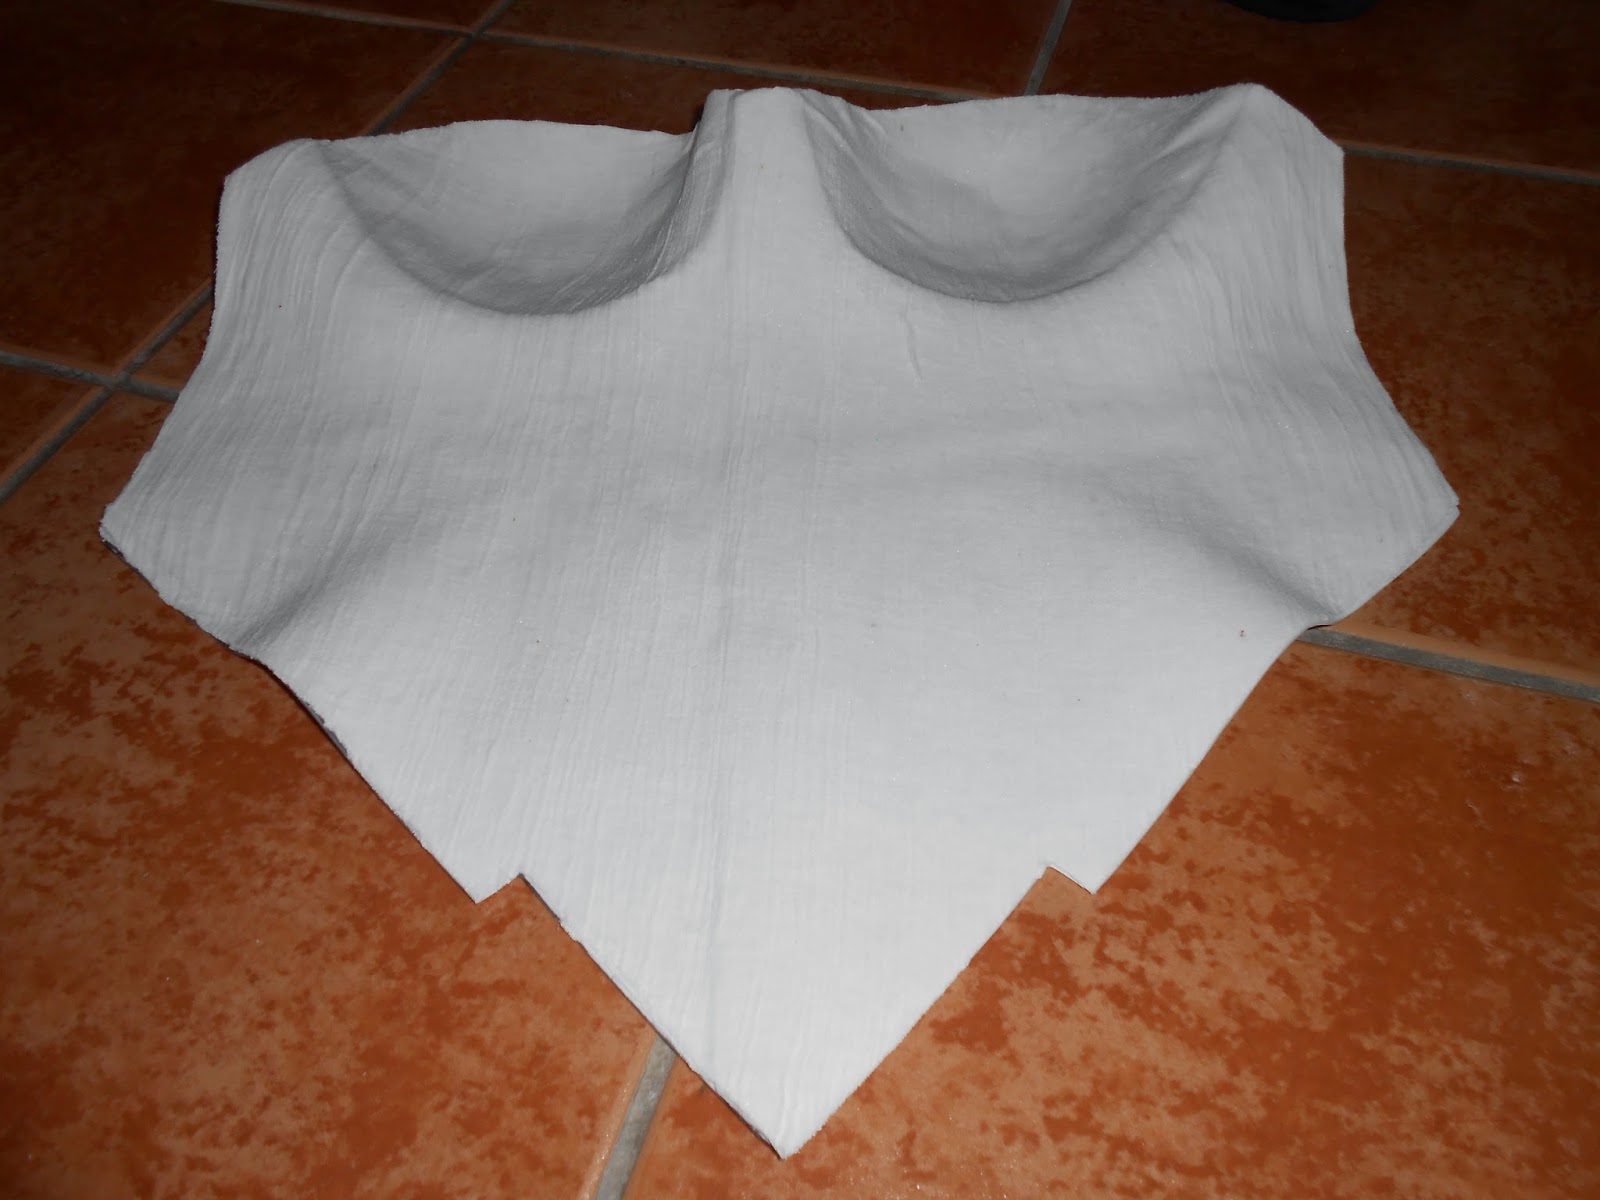
Then you cut the back out so that you can get it off the mannequin and cut out your separate pieces. This gives you your pattern.

2. Moulding the foam
The foam I used was purchased at my local art shop. Unfortunately the largest I could get my pieces as A3, so I did have to add a join down the centrefront of the main part of the plate. To accomodate this, I made sure that there would be an overlap.

I then grabbed out my stamping heat gun. I cut a piece that was much too big for the bust cups and then lay down my mannequin and started heating and moulding the foam over with my hands. It's a real pain to do and very hard to keep it smooth, but I managed to get them done in the end. My only disappointment is that the top edge is a little bumpy. Not a big deal though as you can't really see it in my outfit. I also had to heat up the main breastplate and shape the hip and waist as I am quite curvy through that area.

I pulled out my hot glue gun and glued the pieces together. Best thing about the hot glue gun is that it dries pretty quick.

The next thing I had to tackle was to smooth over the joins so that it would not show through my final finish. I used a texture paste that I picked up from Spotlight a while ago. It's something that I have used many years ago in highschool to create texture art work.

This time though, I just got stuck into it with my hands and layered it on until I had a smooth line, letting it dry between layers. It actually worked quite well.


4. Strengthening
Another tutorial that I saw online showed an easy way of strengthening armour, by supporting it with glue and fabric. I dug some lightweight crinkle cotton out of my fabric cupboard and started smoothing it over the back of the breastplate, glueing it in place with PVA glue. Two layers got me to a very strong finish that holds its shape very well.

And then I trimmed the edges off with a pair of sharp embroidery scissors.
5. Sealing and Base Paint
The PVA glue came back out for a couple of light layers over the front. For this it was watered down a bit. The idea is to seal the foam so that it doesn't soak up all your paint. To finish this step, I gave it a coat of silver paint as my base coat underneath everything.

6. Texture
Galadriel's breastplate has a fish-scale effect. To imitate this, I purchased a bunch of sticky dots from one of the local cheap shops (Daiso as it happens) and applied them in rows one after the other. I also added another layer of PVA glue underneath to help the really stick. I popped some old work sheets underneath while I was doing this so that it would keep it's shape.


I then grabbed out my tiny scissors and trimmed my edges back. I finished it with another layer of PVA glue to help seal the dots in place. (Yes, I used up all of the PVA glue we had at home). No photos, but this is where I should have added the bust and hip lines. I ended up adding them later and then going back with the silver paint.
7. Painting
I covered my mannequin with a few garbage bags, dug out my silver auto spray paint and coated up the breastplate with a few layers.

8. Straps
I then cut some slits int he side of the plate and threaded through some cotton tape, stitched it down on the underside and attached some back clips. I wanted to be able to put the breastplate on by myself so the clips help me do that, and they are covered by the cape section of the gown.


9. Weathering
I didn't do this to the full effect the first time I wore this costume, but I realised my mistake and went back again. It was really simple to do. By the way, the paper dot's are sealed with PVA glue so there is no danger with using water.
To do this, I tore up some old fabric to use as my smearing cloths. I got a tub of water, and squeezed out a fair amount of black acrylic paint. You need three cloths. Basically, just smear on some black acrylic paint over a section with one cloth. Dip the second cloth into the water and start wiping the paint off. Then the third cloth is to dry off any excess water. The black pain stays in the grooves giving it an aged appearance. The one on the right has more weathering.


And that's it. Quite simple, and I am pleased with how it turned out. So much so, that I want to make more foam armour. But if I can manage to steer clear of bust cups I will be happy. Maybe that is where I should invest in thermoplastic for armour.


