Showing posts with label Wig. Show all posts

Saturday, November 27, 2010

Georgian Wig Tutuorial

For my second attempt at synthetic wig styling, I thought that I would be really nice and whip up a bit of a tutorial complete with step-by-step photos. As an introduction, I am making a late Georgian hedgehog wig (there are a few of these worn in the movie "The Duchess"). This sort of wig is appropriate for late 1770s - 1790s. The idea is to have very tight curls that spring back when pulled.
As a start, I am using a wig that I had in my stash from when I dressed up as God from Dogma, so it is a very long wig. Unfortunately I had tried my hand at styling it before so it required quite a lot of brushing out. What you want for this sort of project is a wig that already has some curl in it, but does not have any bouffant sort of back combing built in. The curl that is already there is just going to make the wig more inclined to curl further. As for length, mine is super long but that is more because it was in my collection already. If you are buying a new one, you want something that is mid back length, though anything longer can be trimmed. Your wig should also be a high quality one, as they have more hair sewn onto the wefts.

Step 1.
Tools - wig, 30cm long strips of fabric, brush with wide tong spacing
The first step is obviously going to be brushing out your wig. For me, this took an age because of the aforementioned pre-styling. Then what you are going to do is to take a smallish piece of hair (I divide mine up by weft rows), brush it smooth and taking a strip of fabric, roll up the hair like you would a hair roller. When you get to the base of the wig, tie the ends together in a knot (or two).This is what they call ragging. When doing this, you really want to keep the hair very tightly wrapped so that you get a very tight curl. You also don't want to grab chunks that are too big because due to the length of your wig, by the time you get to the base, the curl ends up rather large. Keep doing this until you have a completely ragged wig.


Step 2.
Tools - kettle, large bowl / bucket, wooden spoon
Now you are going to be setting the style into the wig. Put a kettle full of water onto boil. Place your wig in the bucket or bowl. Once the kettle is boiled, pour over the wig, making sure that all the hair is completely covered. This is where I use the wooden spoon to help submerge the wig. I have read some forums where they tell you not to use boiling water on your synthetic wigs, but every time, I use boiling water, it is totally fine. If you are worried though, I would suggest stopping the kettle just before it has come to the boil. I then leave the wig in the water for a good 10 - 15 minutes just to make sure that it has had time to soak the water right into the centre of the curls.


Step 3.
Tools - chair, pegs, wooden spoon.
Drying. Drain off as much water as you can from the soaking wig, this is where the wooden spoon comes in really handy. Then take your wig outside where you don't mind all the drips and hang it up to dry. You can either peg it to your line or drape it over something. I just drape mine on the end of an outdoor chair. And then just leave it to dry. Depending on the weather and how thick the rolls ended up being this should only take about 12 hours. I like to leave mine for closer to 24 hours if not longer (it will really depend on how far in advance you are styling your wig). the best way to check is to start squeezing the rolls to see if they still feel wet. You may just have to unwind one of the thicker ones to test this. And of course, you could always try to speed up the process with a hairdryer, just don't get it too close to the wig for fear of melting the hair.


Step 4.
Tools - wig head and stand or model, scissors
Now for the moment of truth. Unravelling your wig. Pop your wig on either a wig head (mine is an old hairdressing one) or find a friend to wear it for you while you style. You will need to anchor it to the head though, otherwise it is going to flop around all over the place while you try to style. the best place to start unravelling your wig would be at the back, just so that you don't miss any of the rags. It's as simple as undoing the knots that you tied and the rolling out the rags. You will just need to be careful not to pull too much otherwise you run the risk of loosing your curls all together. I only list scissors in the tools as you may have rolled your rags a little too oddly at the ends (like I did) and you will need to trim off the very ends to take the rags off. Also, if the ends look a little too ratty, you could either trim them now or after the styling process.


Step 5.
Tools - tail comb, wig head, scissors, hairspray
Styling. By now, you should have found some research pictures on-line of how you want to style your wig. I am aiming for a generally roundness to my wig, with some looser curls hanging at the bottom. The best way to get the bulk at the base of the wig to build height is to start backcombing. As this is a wig, you really don't need to worry about your technique and in fact it is better if you a little rough as you are wanting the style to stay. (Unless of course you intend to re-style your wig at a later date). Start building bulk by working your way around the wig. First take the curl (I work one or two at a time) that you want to bulk up the base of, spray liberally with hairspray and take your comb and start backcoming the hair towards the base. It really is quite simple. As for the final styling, I can't really explain what I am doing, as it is really subjective to the style you have chosen. I just worked my way around the wig, first building up the base to get the height that I wanted and then concentrated on styling the remaining hair that was hanging out, by carefully combing it, spraying and pinning into place where necessary. My best advice is to just have a go.

Step 6.
Decoration. This is where you get to be a little creative. The Georgians loved big hair accessories. I didn't make any of my decorations permanent as I have a few Georgian gowns that I intend to wear the wig with. You can however attach flowers, ribbons, bows and feathers to combs that can be removed, so that you are able to customise your wig for your outfit. And there is of course, just simply adding a hat to the ensemble. I will say however, that you will need to be careful of the weight of your hat as it may flatten your wig slightly.


And voila. You wear the wig.


*NOTE* ragging can be done to style your own hair as well, I have found for me, that the best way is to start with damp hair, add a product (mousse, or setting lotion) through the lengths, roll up and leave to dry. It really depends on the length of your hair and how much you are rolling up as to how long it takes to dry.

Sunday, August 8, 2010

An Egyptian Wig

In a previous post, I mentioned that I my next upcoming project is for a Roman feast that I will be attending. I spent 2 weeks hunting around online researching the different ancient cultures trying to decide what I could wear and what would look flattering on me. (Not much, I tell you now). I came down to Egyptian, but it was all contingent on the wig. If I could get the wig looking good, then I would make the rest of the costume, because without the wig, it would all look kind of plain and boring really. (Inspiration photo for my wig on the left).

So, last weekend, I got stuck into getting my wig ready. After cleaning up my costumes on Friday night, I went through my box of wigs and pulled out my two longer black ones (the short black bob will never be changed!). One was from my American McGee Alice costume, and wasn't really the correct cut or colour, so I didn't mind donating it to the experiment, and the other was a long-ish black wig that I bought with the intention of using for a Wednesday Adams costume. Both wigs were dead straight synthetic fibre. I spent most of Saturday combining the two.

The reason for this is that one wig simply does not have enough hair in it to get the look that I want. I decided that I would be cutting up the long one (because it had a fringe) and sewing it into the shorter wig. In hindsight this ended up being the better option as the shorter wig had more rows of hair in it, and it was a better wig all over. It's difficult to explain what I did without pictures (stupid me never thinks of taking progress pictures) but I will give it a shot.

If you have a look at the inside of a wig, it is made up of a front, back and side base of lace with hair sewn on and strips of elastic running down the length of the scull which the rows (or wefts) of hair are sewn onto. I basically just started chopping it up. I started at the bottom so that I would be able to comb the hair down into place when I was done. I would recommend this at any rate for future note, as I think it would be a nightmare to start from the top. But I basically just pulled off the wefts of hair, and whip stitched them onto the corresponding wefts in the other wig. It was really quite simple, just very time consuming. In the end it worked out rather well.

My next step was to style my wig. I did a bit of research and read a few forums about how to curl wigs (I wanted to crimp mine) and discovered that people recommend setting it with how water. I plaited my wig up and put the kettle on. I dumped the wig into a large bowl and poured over the hot water (not boiling, but starting to). I stirred it around with a wooden spoon for a while to make sure that all the hair was under the water and left it for about 10 minutes just to make sure the water had gotten into the plaits. I then took it outside, and propped it up over a chair to dry.

Once it was dry, I started unravelling all the plaits. And low and behold, it had actually worked! Again, I didn't take any progress shots, but you can see a bit of the crimp still in the wig. After that, I just started styling my wig. I was really aiming for a very full wig that looks almost like African hair (the Egyptians loved Nubian hair for their wigs). So I popped it onto my hairstyling head, and started on in with the teasing and hairspray. I was mainly brushing out the crimp to get a bit of a frizz and then teasing up the upper lengths to create the fullness. I even managed to get rid of the slight centre part in the wig. More hairspray to hold it in place...

And to finish off, I wanted to dreadlock the ends. I didn't really do this in a uniform fashion, I just grabbed a sizeable hunk, rubbed in some hair wax, teased, rubbed, teased and rubbed until I got the dreadlock look. This was the most awkward part of the whole process, mainly because I was hoping like hell that it would work as up until now, I was happy with my results. But I kept going around. After I was done, I grabbed out my sharp scissors and lopped the ends off the dreads so that they were the right length and neat looking at the ends. A couple final coats of hairspray and we have my wig....

Now I just need to make the wired / beaded headband. Basically these were used to keep the wig in place on the head. Me, I went to the junk jewellery store and bought a necklace to pull apart.

Friday, March 26, 2010

JAFA Progress entry #17

And as an update that I have not been completely lazy this week (I have kinda been caught up trying to get my Sims through University), I have made a little progress on my remaining JAFA items. I finnished my first fan. Last year around November, I purchased a whole box of plain paper fans with the intention of painting a couple to match my dresses. While resting my fingers from the hand sewing needle, I got stuck into painting one. It's very simple, but I think I need to do a little more research on what constitutes an historically accurate fan, or something that is appropriate at least.

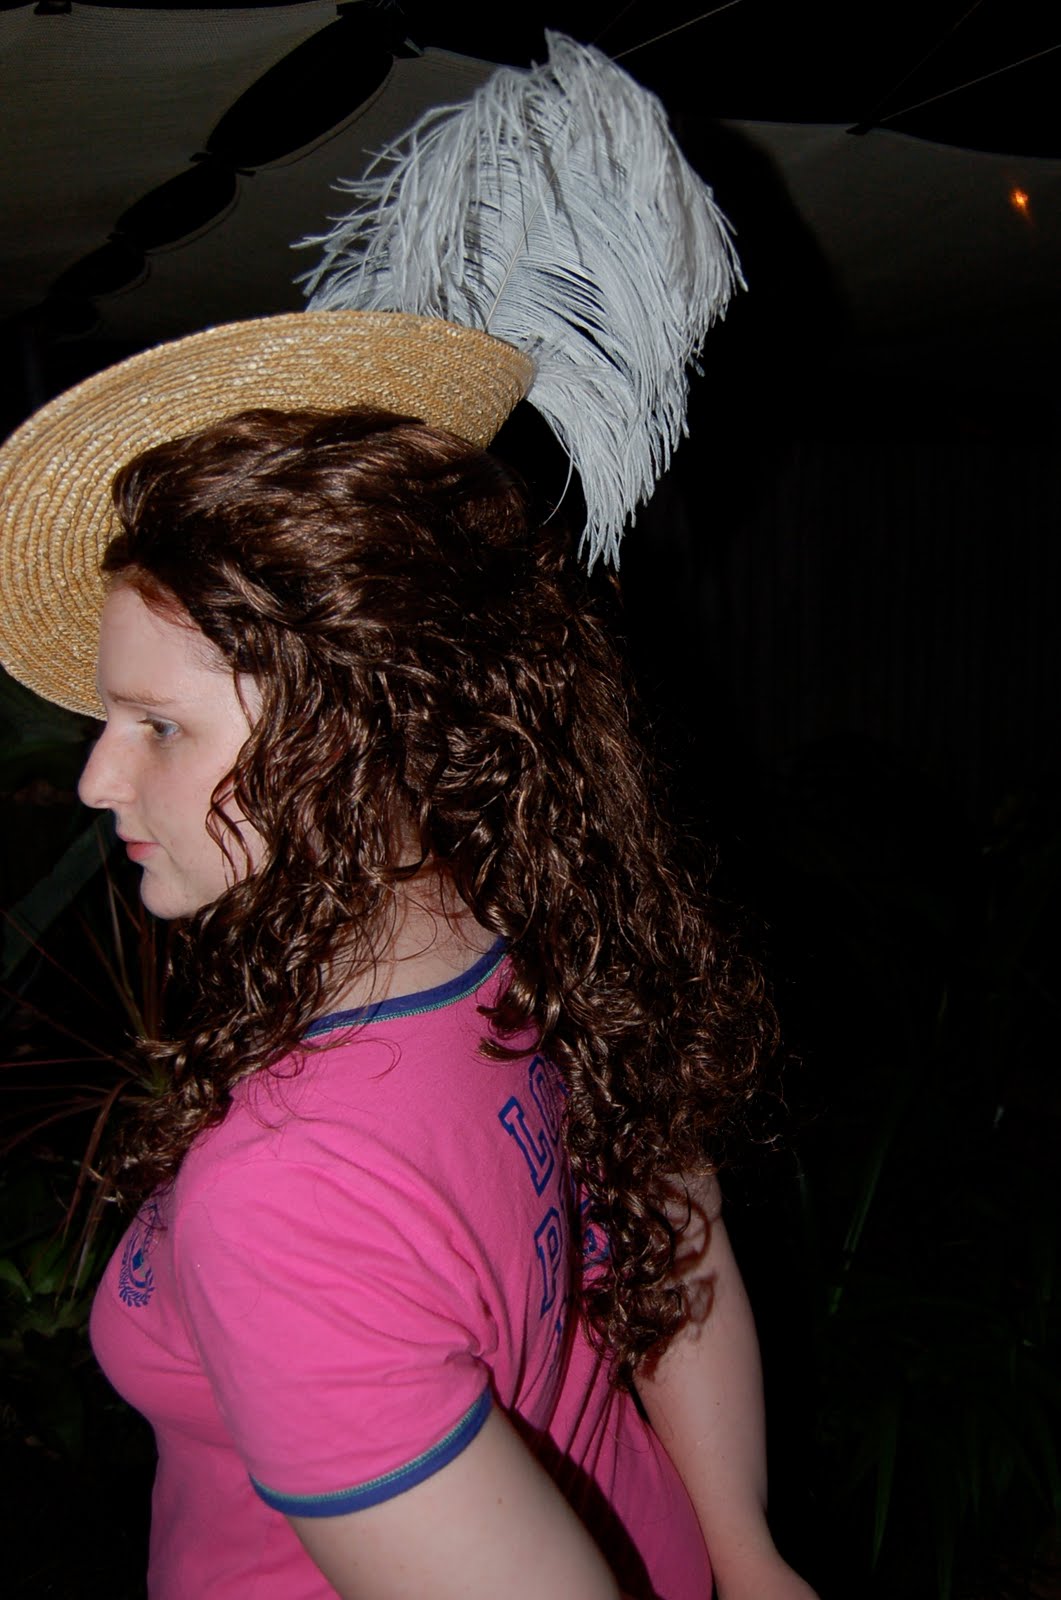
And in another bust of energy, I got stuck into styling my Georigan wig. Last you saw was that it was rolled up in curlers. I let it dry for a few days and then let it down. Somewhat to my surprise it was very curly, though I think this is in most part due to me using hairspray as well as water to set the curls. I then attacked it with my tail comb and some more hairspray. I backcombed the topmost curls to get a good wad of height in there first, and the started pinning it back. I ended up chopping out quite a bit of hair but that was not really unexpected considering the beginning length of the wig. So after styling, I popped the hat on top... (excuse the PJs).

Monday, March 22, 2010

JAFA Progress entry #16

And another one is done. I am so overtly happy. I now only have one more ensemble to put together. I finished this one yesterday afternoon, but was so buggered that I didn't get around to posting about it. The dress is based on one of the ones that is worn in the movie "The Duchess". It is done at an early 1790s dress. It features the same style of back as the earlier Georgian dresses but it ends at the waist. where the skirts are gathered on. The front is made as a drawstring at both the neckline and the waist. It then has a silk waist sash tied around the middle. I will be wearing this with my Georgian undergarments - ie, stays, false rump and 2 petticoats. Believe me when I say it gives a nice shape. I am pleased with how it turned out, especially since I was butchering a pattern that for an era that I have never made before.

This dress adds the green colour to my rainbow wardrobe of gowns for JAFA. So far I have pink, blue, white and teal, yellow, purple and now green and brown. The next dress is actually cream and orange. Very autumn colours.


On another note. I sat down last night for about 5 hours and started on the styling of my Georgian wig. I attached my mannequin head to a stand so that it could perch easily. Then I put the wig I am styling on top and started curling it. Because this is a synthetic wig, I can't use heat to give the curl so I have to rely purely on setting the curl in place. I did this by first wetting the hair with a spray of water and the dousing it in hairspray and the rolling it up and pinning it in place. The wig I am using is my super long one that I wore with my Dogma God costume. The costume doesn't fit me anymore and I don't have certain parts of it, so I was happy to give new life to the wig and revamp it. The first step was brushing it out. Because it was a curly wig, I was unable to brush it in the past because the curl would come out, so it ended up being quite a bit of a knotty mess. At the moment the wig is sitting in the sewing room drying out. I know it won't take days to dry, but I would rather be safe than sorry, so I thought I will leave it until the weekend before I attempt to style it. Here's hoping it works.