Showing posts with label Game Of Thrones. Show all posts

Monday, June 22, 2015

Margaery Tyrell in Mourning

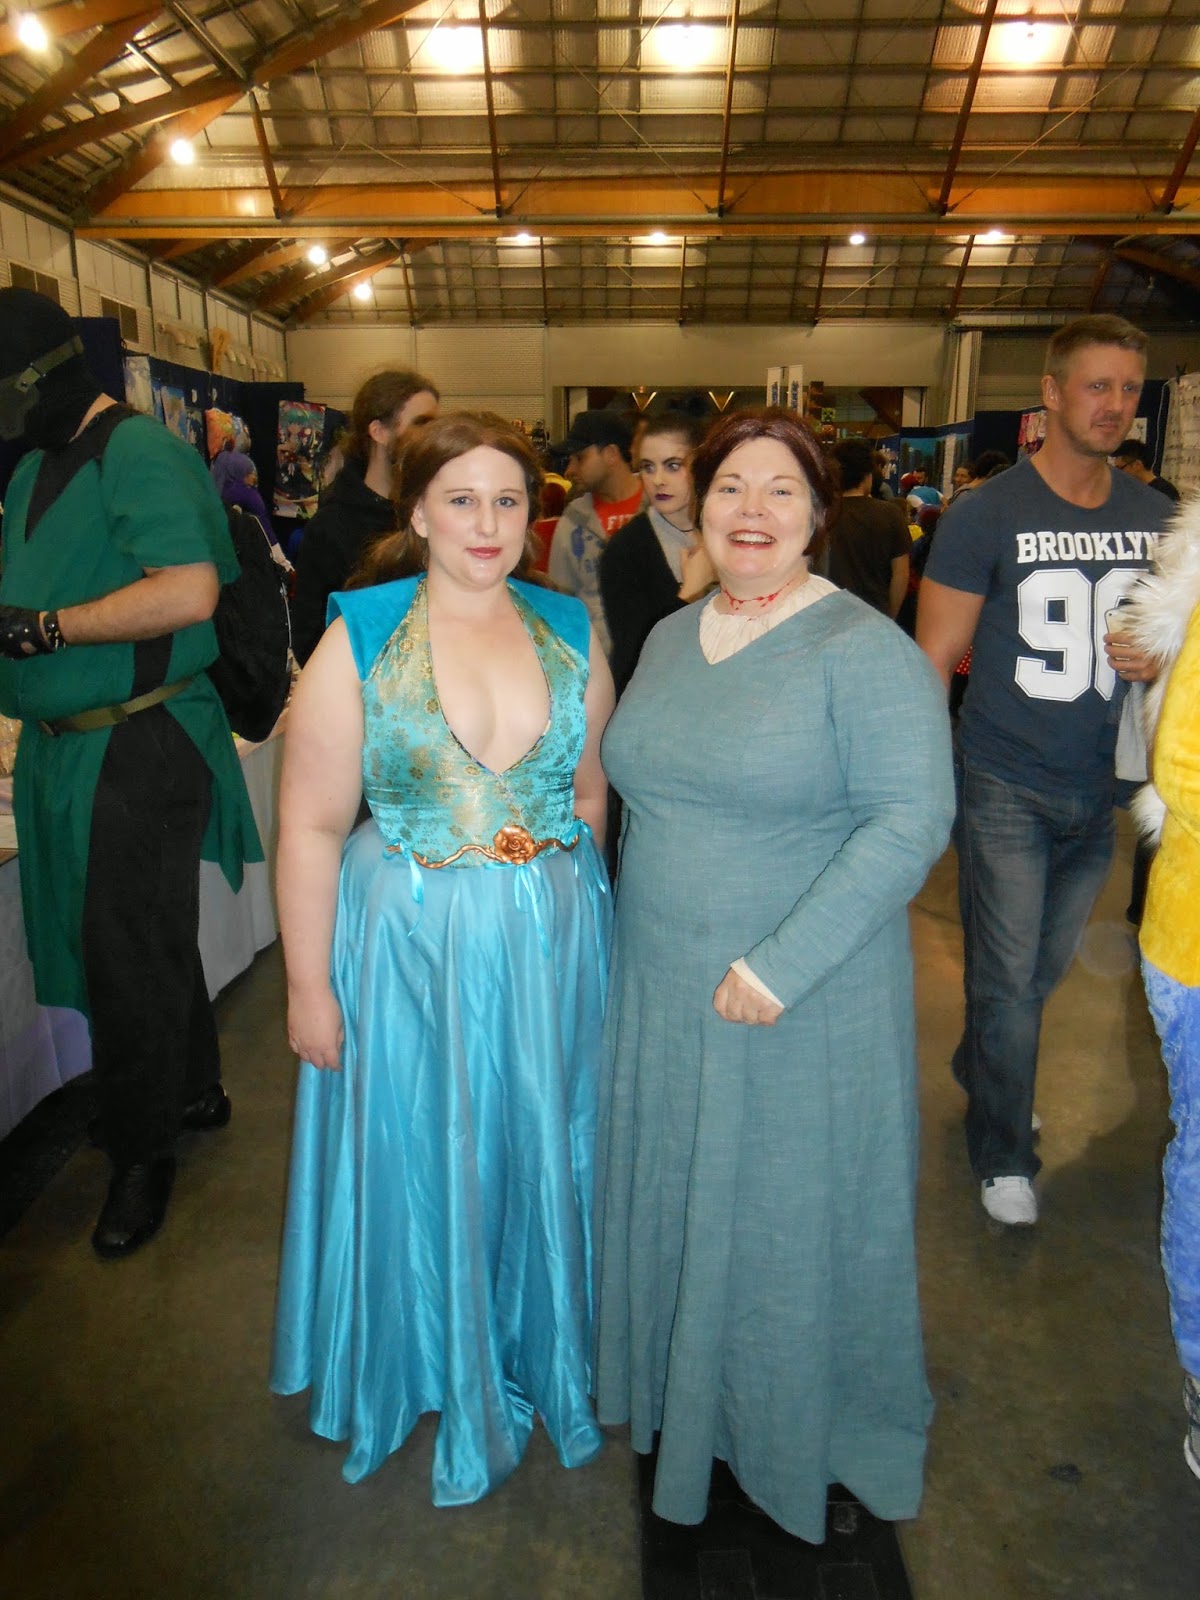
Back in April this year, I debuted my new Margaery Tyrell costume. From season 4 of Game of Thrones, came her mourning gown. This costume was worn for a good portion of the season as well as being used in the promotional material for the season. I was also happy to see it pop up early in season 5 as well. At any rate, what follows is a small tutorial of how I put this costume together.

My first step was to track down the fabrics that I would be using. This was quite a bit simpler than the last Margaery gown that I made as I knew where to look. I headed to puresilks right off the bat. My bodice fabric is an embroidered silk dupion and is lined with scraps of 100% cotton. The skirt is cotton voile. I wanted the skirt to be light enough to flow and gather up nicely so that it could be incredibly full, but I also wanted it to be easily washed as I was unable to do with my last Margaery gown. The skirt took 5 metres of fabric in total. 

I started with the bodice, which would require the most patterning work. I had taken a bunch of screencaps to try to work out the back of the bodice. It turned out to be very similar to one of the other bodices that Margaery wears with a full back. This made fitting a lot easier as a full back provides a lot more support.

The pattern I based the bodice on is Simplicity 4079 - a vest pattern.

The key to this particular bodice is the design lines running vertical down the side underarms. I made them as seams so that they could provide a fitting function as well as design. The next step with the pattern was to draft off the pieces. I had made this vest before so I knew what size I would be working from. Using the front and side front pieces I drafted the full front - estimating the crossover and drafting out the seam allowance so that pieces were as one.

I then divided up the pieces and drafted in the design lines. I did a couple of mock ups out of scrap fabric (which I forgot to photograph) to check that the fit was right, the front was crossing over in the right place and that the seam design lines were in the correct place. Below is the pattern completely laid out in order - so half of the body.

I then cut and started piecing the bodice together in my fabrics. It is made up of four layers of fabric - my outer fashion fabric, the lining fabric (with the centre front piece cut in the outer fabric) and two interlining layers. My lining and interlining layers are 100% quilting cottons. I just used leftovers from other projects.

I stitched all but the shoulder seam together as this would be used to turn the bodice later and pressed the seam allowances flat.

The next step was to start working on the boning. I have a lot of experience working with corsetry so I knew going into this where I would like my boning placed. The beauty of Margaery's clothing is that all the bust support is built into the bodice, so that the cross-over section can be quite low yet there is still enough bust support. Well, for me at any rate. Very busty ladies may need to think about working in bust cups for extra support or even making the cross-over higher.

 All of my boning channels are stitched in contrast colour so that you can see them a bit more easily. I simply put the two lining layers right-sides in and stitched in my channels. This way I avoided the boning accidentally catching on seams. You will notice that the front bust support channels curve from the high armpit, along the bust and then down. This helps to push the bust from the side to give more cleavage.

I then inserted my boning. I chose to use cable ties - a cheap plastic boning choice. Steels would definitely provide more support for fuller busted ladies but you could also purchase plastic boning from corsetry supply shops. In Australia, this is not so easily acquired and I have had a lot of success with cable ties. I cut them to length (taking into account the seam allowance and sanded back the corners to round them off and inserted the boning.

 I then sandwiched all the layers together in the following order:
(table)
- fashion layer right side up
- lining layer wrong side up
- interlining layer with boning inserted

and stitched them together around all the edges but NOT the shoulder. As I mentioned before this is how you turn it through.

I then clipped the curves, and pulled everything through the shoulder openings. (And this is where I have no more photos as I was too busy just trying to make my deadline). I pressed it all neatly flat on all edges. I then stitched the shoulder seams, keeping the lining out of the way using my machine. The lining was then hand stitched together to finish the lining with a simple slip stitch.

I finished the bodice off by pinning the cross-over in place and marking where I would need my hooks and eyes. These, I hand stitched on where I felt that I would need them.

I then made the skirt as a separate piece. It is simply the length of fabric sewn to a waistband that fits under the bust with two shoulder straps that hold it up. The should straps sit outside the bust and cross to the centre back in the aim of keeping them hidden.

I finished off the look with a lace front wig from wigfever and a replica necklace 3D printed from Print My Props on Etsy. Before I wear this costume again, I will definitely be making a cotton voile petticoat to wear underneath, as in some photos it is a little bit too sheer for my comfort. But otherwise, I am very pleased with how this came together.

Friday, April 24, 2015

Supanova on the Gold Coast

It feels like it has taken me all week to recover. Last weekend, I attended Supanova Gold Coast - one of the first in the round of conventions for the year and actually one of my first costume events this year. Summer is just too hot and humid in Brisbane to be comfortable costuming. I didn't get to take any photos over the weekend as I had a very unfortunate phone smashing incident where only the bottom right corner is now usable. I'm still waiting on my new phone to be delivered. However, I did actually costume the entire weekend and was lucky enough to have Pandom Images snap some photos for me.

The weather here has started cooling down in the evenings, so I decided I could handle the heat of wearing my Saber Lion cosplay. It's a super comfortable costume and fun to wear, even if there are very few people who know what it is. 

Then, on Saturday, I debuted my new Diablo 3 Monk costume. It's my first time working with armour and if you follow my facebook page, you would have seen some of my progress shots. There were only a few fabric elements to the costume and the rest required my forray into working with foam. I've learnt a lot and will definitely be trying my hand at it again. I based my armour pieces off game screencaps. Basically, I created a new female Monk and every time I got a new piece of armour or weapon, I screencapped it - giving me a huge pool of images to pick and choose my armour from.

And finally, for Sunday, I wore my new Game of Thrones costume - Margaery Tryell in her mourning outfit. I loved my previous Margaery costume and was sad to see it die so it was a no brainer when choosing to make another GOT costume. I decided on her mourning outfit because I just haven't seen it made before by other cosplayers and I loved the look of it. This time though, I took steps to make sure that it would be a lot more durable than my last Margaery but that is all for a later post and tutorial. I was pleased with it though and so happy to find a Joffrey cosplayer for a few photos.

Tuesday, June 17, 2014

Sydnova 2014

Last weekend, I spent an exhausting couple of days racing around at Sydney Supanova. I had my weekend all planned out and my flights were booked on boxing day sales. That is, until I found out that my only university exam would be on the Friday evening at 5.30pm. Which then meant that I could not attend Supanova until Saturday after a very early flight.


Thankfully the exam went well and I was ready to look forward to a stress-free weekend. I slugged out of bed at 4.30am to make my 6am flight from Brisbane to Sydney. It was packed. It was 8am by the time I got off the plane and picked up my luggage before heading to my friends place to get ready and head on out.

It was the day that I debuted my new costume. Princess Jasmine. I have always wanted to dress up as Princess Jasmine. Aladdin is a movie that came out when I was eight, so I saw it in the cinema, learnt all the songs and have grown up loving it. I just don't suit making the traditional green pants and bodice Princess Jasmine outfit. So instead I chose to make her betrothal gown from the movie. I made a full corset for underneath to support give me a nipped in waist and full hips like Jasmine. The gown is made from silk flat lined in cotton voile while the light purple elements are made from a horrible crisp sheer fabric. I topped it all off with foam and scuply made accessories. The wig was by far the most challenging piece to finish.

But I love how it turned out. And I even managed to get my photo taken with a Jafar who was there as well.

After a full exhausting day, I crashed, thankfully sleeping really well so that I was ready to don my Margaery Tyrell gown for Game Of Thrones day. We were meeting with a group of other GOT cosplayers for a photoshoot. We had planned for the 4pm photo session with Jamie Lanister himself, however he apparently was called back to set for filming and we missed our chance. At least we found out before time and were able to get a refund on our photo sessions.

And here are the shots that I did get of the various GOT cosplayers around the event. Sam impressed me the most as the cosplayer really looked like the actor. But so many were so well done as well.

Due to an unfortunate train / passenger beverage spillage incident, the dress is now all stained on the bottom. I'm not sure that I will get to wear it again, but at least I have had a blast being Margaery Tyrell. Maybe, I will look at doing one of her other gowns next....