Showing posts with label Galadriel. Show all posts

Tuesday, May 6, 2014

Galadriel Armour

Earlier this year, I took my first foray into making costume armour. Given that this would be my first piece, I decided to use foam to try and keep costs down. And I managed to take a good number of photos while I was doing it, so I thought I would share.

NOTE - Please be aware that I am by no means any sort of expert, I just tried my hand at this and thought I would share my first experience. Maybe you can learn from my botch ups. I started out by watching this tutorial on youtube. https://www.youtube.com/watch?v=hj-WC35cxgs

1. Making the pattern

Many tutorials use your own figure to make the base pattern, but I didn't quite want all those lumps and bumps, and thought I would really struggle to do this whole thing on myself, so I set my mannequin to the right measurements, popped on one of my bras and got started.

First step is to cover it all in a good layer of clingwrap. I bought some of the really cheap stuff so that I could make sure I had a really good coverage. Then you get some paper masking tape, tear off bits and cover everywhere that you want your breastplate / armour to sit against you.

Next, grab a marker and draw the pattern pieces onto your tape. The bust cups should be separate pieces.

Then you cut the back out so that you can get it off the mannequin and cut out your separate pieces. This gives you your pattern.

2. Moulding the foam

The foam I used was purchased at my local art shop. Unfortunately the largest I could get my pieces as A3, so I did have to add a join down the centrefront of the main part of the plate. To accomodate this, I made sure that there would be an overlap.

I then grabbed out my stamping heat gun. I cut a piece that was much too big for the bust cups and then lay down my mannequin and started heating and moulding the foam over with my hands. It's a real pain to do and very hard to keep it smooth, but I managed to get them done in the end. My only disappointment is that the top edge is a little bumpy. Not a big deal though as you can't really see it in my outfit. I also had to heat up the main breastplate and shape the hip and waist as I am quite curvy through that area.
I then laid over my bust cup pattern pieces and cut around the shape making sure that there was an overlap to join onto the main breastplate.

I pulled out my hot glue gun and glued the pieces together. Best thing about the hot glue gun is that it dries pretty quick.
3. Smoothing

The next thing I had to tackle was to smooth over the joins so that it would not show through my final finish. I used a texture paste that I picked up from Spotlight a while ago. It's something that I have used many years ago in highschool to create texture art work.

This time though, I just got stuck into it with my hands and layered it on until I had a smooth line, letting it dry between layers. It actually worked quite well. 


4. Strengthening

Another tutorial that I saw online showed an easy way of strengthening armour, by supporting it with glue and fabric. I dug some lightweight crinkle cotton out of my fabric cupboard and started smoothing it over the back of the breastplate, glueing it in place with PVA glue. Two layers got me to a very strong finish that holds its shape very well.

 And then I trimmed the edges off with a pair of sharp embroidery scissors.
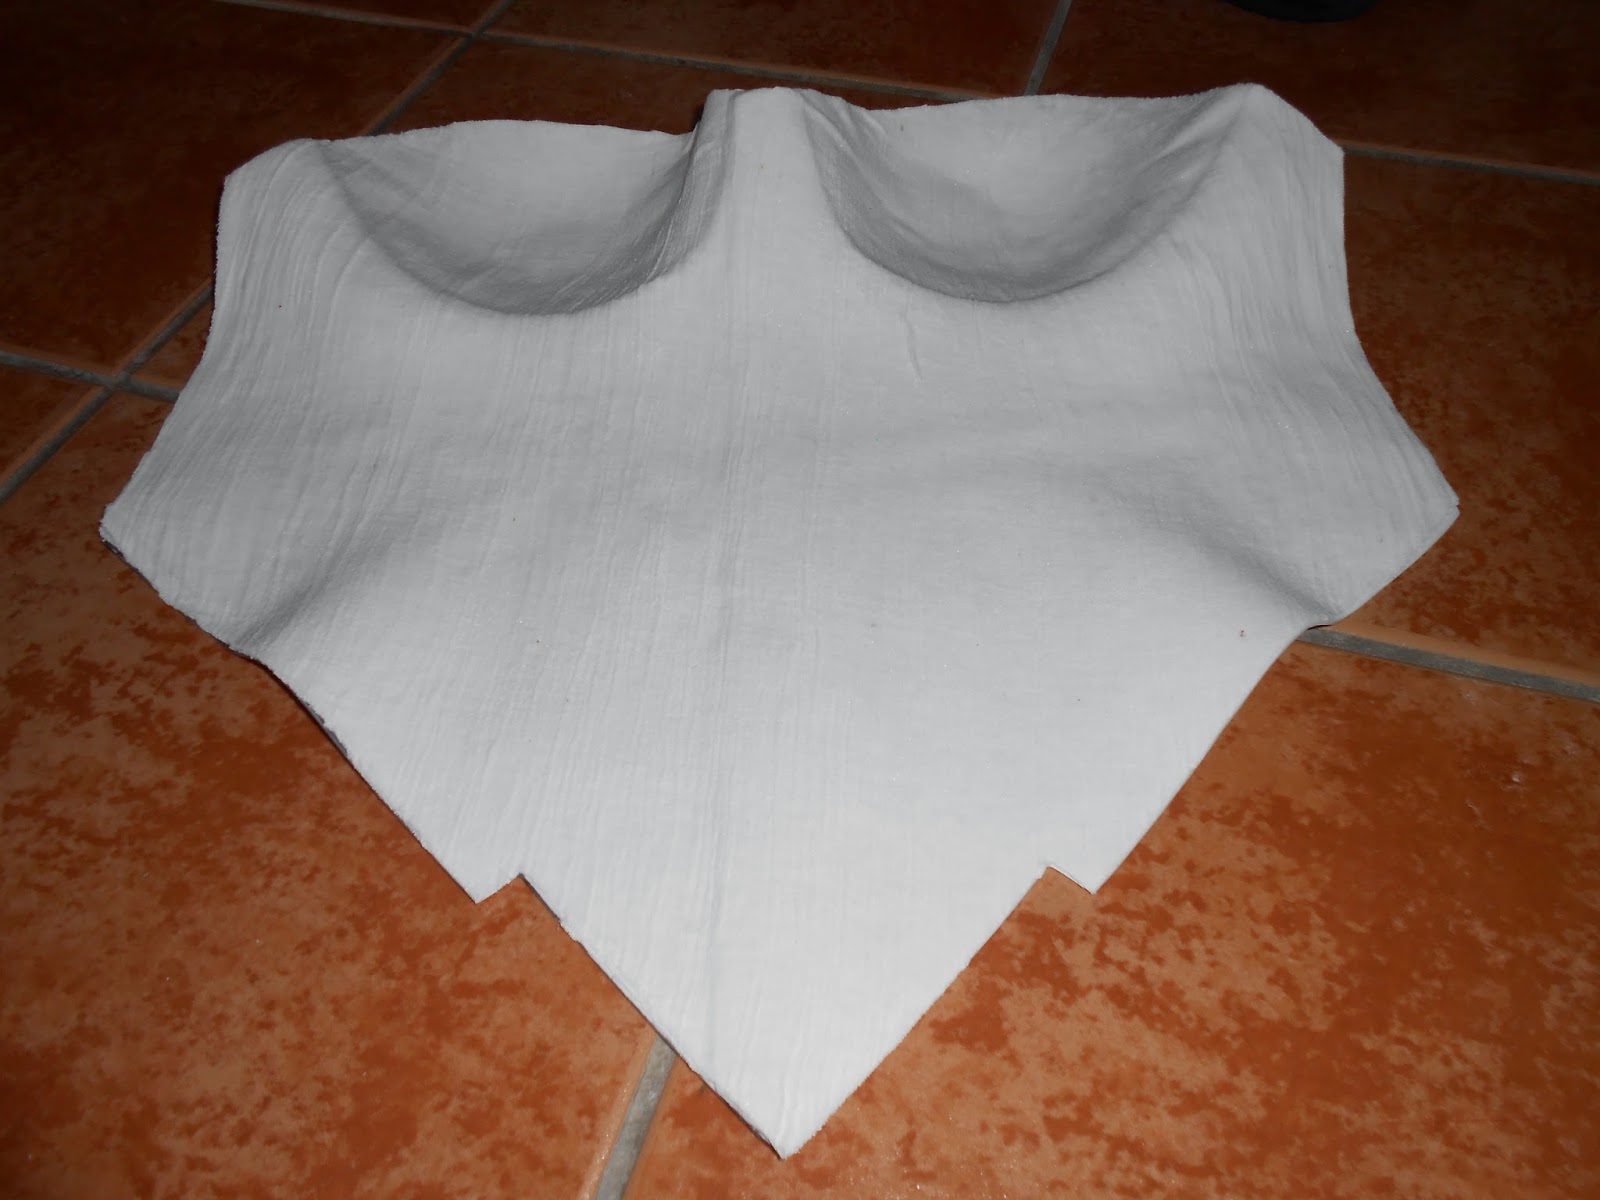
 5. Sealing and Base Paint

The PVA glue came back out for a couple of light layers over the front. For this it was watered down a bit. The idea is to seal the foam so that it doesn't soak up all your paint. To finish this step, I gave it a coat of silver paint as my base coat underneath everything.

6. Texture

Galadriel's breastplate has a fish-scale effect. To imitate this, I purchased a bunch of sticky dots from one of the local cheap shops (Daiso as it happens) and applied them in rows one after the other. I also added another layer of PVA glue underneath to help the really stick. I popped some old work sheets underneath while I was doing this so that it would keep it's shape.
I then grabbed out my tiny scissors and trimmed my edges back. I finished it with another layer of PVA glue to help seal the dots in place. (Yes, I used up all of the PVA glue we had at home). No photos, but this is where I should have added the bust and hip lines. I ended up adding them later and then going back with the silver paint. 

 7. Painting

I covered my mannequin with a few garbage bags, dug out my silver auto spray paint and coated up the breastplate with a few layers.

 8. Straps

I then cut some slits int he side of the plate and threaded through some cotton tape, stitched it down on the underside and attached some back clips. I wanted to be able to put the breastplate on by myself so the clips help me do that, and they are covered by the cape section of the gown.

 9. Weathering

I didn't do this to the full effect the first time I wore this costume, but I realised my mistake and went back again. It was really simple to do. By the way, the paper dot's are sealed with PVA glue so there is no danger with using water.

To do this, I tore up some old fabric to use as my smearing cloths. I got a tub of water, and squeezed out a fair amount of black acrylic paint. You need three cloths. Basically, just smear on some black acrylic paint over a section with one cloth. Dip the second cloth into the water and start wiping the paint off. Then the third cloth is to dry off any excess water. The black pain stays in the grooves giving it an aged appearance. The one on the right has more weathering.


And that's it. Quite simple, and I am pleased with how it turned out. So much so, that I want to make more foam armour. But if I can manage to steer clear of bust cups I will be happy. Maybe that is where I should invest in thermoplastic for armour.

Thursday, April 10, 2014

Supanova Gold Coast - Friday

What a weekend it was. Last Friday, I took the day off from Uni work, packed up my costumes, picked up my travel buddy and made my way down to the Gold Coast for Supanova. I should have checked my driving instructions before I left because I ended up taking the wrong exit, too early and we wobbled through most of the Gold Coast to get to Broadbeach. It was a bit of a detour and took a bit longer than it otherwise would have, but it was the scenic route.

At any rate, we arrived at the convention centre to get Miss Diana Daring set up for her stall in Artist's Alley. Her stall is Seams Nostalgic She make the most amazing geeky wrap skirts (I have three). After getting her set up, we headed over to check into our hotel and pick up some groceries for the weekend.

We hadn't settled in long before we made the effort to get frocked up in our costumes and head on over to the event - a bit late for the opening night, but still in time to catch the Q&A session with Lucy Lawless.

I pulled out one of my latest creations - Galadriel for the evening. Since my first wear, I made a couple of adjustments to the breastplate to strengthen it, secure the front details and add a bit of further weathering. I'm happy with how it turned out, but given that Lord of the Rings was made so long ago, it might be a bit out of date. I was mistaken for Danerys from Game of Thrones a few times, mostly in part I think because the wig is blonde and the scalework on the breastplate. At any rate, I love the costume.


But afterwards it was back to the hotel for dinner and a bit of last minute sewing before Saturday began.

Tuesday, March 25, 2014

Party like a hobbit

It was quite the eventful weekend for me. I spent Saturday cracking onto all my sewing and uni work, making a lot of progress. But the next thing on the list was my attendance at a Tolkein themed 21st Birthday Party for a fellow member of the Australian Costumers Guild. The party organisers (the Birthday Girl's mum) put on an amazing spread of food for the big day. I had a great time with my fellow costume buddies and meeting a couple of other people dressed up. I did feel a little sad for the birthday girl as so few of her other friends had gone to the effort to dress up, but I am glad that the ladies of the ACG made the effort.

I made the trip over with my cousin who was dressed as Tauriel from the latest Hobbit movie. We made such good time with traffic that we were early, so we decided to spend our time snapping a few shots. It was a warm day, but the giant industrial fan came in handy for a few photos. Later on we were joined by a few more ACG members, dressed as the most adorable hobbits, hairy feet included. And our birthday girl was dressed as traditional Galadriel.

For the occasion, I decided to make up spelled Galadriel from Lord of the Rings, The Fellowship of the Ring. For those not in the know, it's a costume that is in the film for all of 15seconds, when Frodo offers the ring to Galadriel and she turns all grey and evil for a split second. I'm not a fan of medieval fashion which is what so much of Lord of the Rings is based on, so I really struggled over my choice. In the end, I am really glad that I decided to go down this route. It gave me experience in working with making costume armour (tutorial to come soon) which I plan to use in the future. And I was so pleased with both my lace front wig and my latex elf ears. I am really looking forward to wearing this one again.

Tuesday, February 25, 2014

What's going on?

Things have been rather busy for me lately and while I haven't been attending so many costume events, I have certainly been busy. Much has been going on in my life this year.

First off, I quit my job, the reason:

I started University. I have decided for a career change and have gone back to study. I am doing a Bachelor of Information Technology at QUT in Brisbane. It's an exciting change, but it means that for the next three years, my life is to have quite a change. I really want to do well since I am investing so much money in it all, so I may not have as much time to sew as I have become accustomed to.

On that note, I have been slowly working on a couple of projects lately. In an earlier post, I spoke about Tinkerbell from Once Upon a Time. And while I am still planning to get that finished in time to attend Gold Coast Supanova in early April, I have another project on my hands in the meantime.

I have been invited to attend a Tolkein theme party in late March. I have never really planned to do any sort of Lord of the Rings or Hobbit costume, so I really struggled to choose what I would like to make. My rationale was to make something that would be a more than one time wear, that could be worn to conventions in the future. I considered making a hobbit costume, but I didn't really want to be one.

In the end, I came down on doing Spelled Galadriel. A costume shown in a very small portion of the first Lord of the Rings when Frodo offers the ring to Galadriel and she turns grey and evil.
I am really liking my progress so far. The biggest challenge I have faced is making the breastplate. This costume is my very first attempt at armour. I really like how it is coming along and I have made sure to take photos every step of the way so that I may be able to share my learnings. The success I have had is making me more confident in my plans for future costumes and I am looking forward to attempting making more armour.